write an application that interfaces a user with an input &/or output device that you made .
Python to control an Arduino
Python is used in many applications including data science, machine learning and web development.
Another area where we can use Python is external hardware control.
External devices include multiple scales or spectroscopic analyzers.
how to use Python to control the LED that is connected to Arduino. Computer-powered Python turns Arduino LED on and off.
Python is dynamically typed and garbage-collected. It supports multiple programming paradigms, including structured (particularly, procedural), object-oriented, and functional programming. Python is often described as a "batteries included" language due to its comprehensive standard library.
First we connect a LED with a resistance of 330 ohm to an Arduino board, then we connect them to the computer to start programming
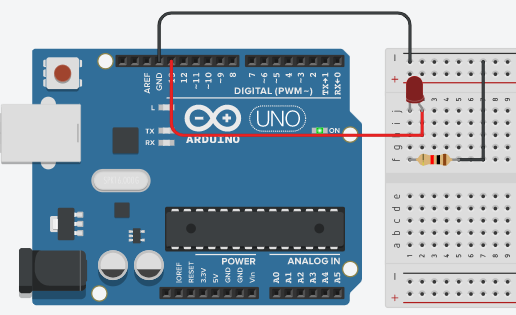
Connect the LED, resistor, and colored jumper wires as shown . Note the LED has two different sized "legs." Ensure the LED is wired in the correct orientation. Current can only flow in one direction through an LED.
short LED leg → resistor → ground
long LED leg → Pin 13 on Arduino
Connect the Arduino to the computer and check the COM port
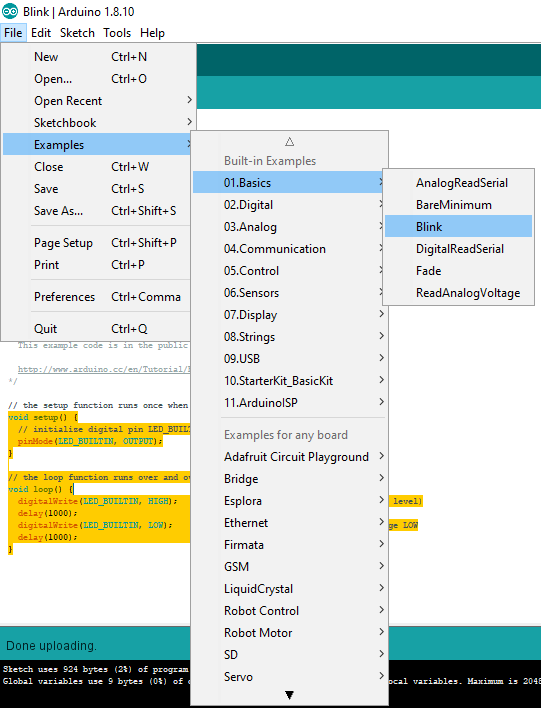
Upload the Arduino example sketch Blink.ino onto the Arduino. Confirm the Arduino and LED blinks
Open the Arduino Blink.ino sketch by going to: File → Examples → 01.Basics → Blink
Now ensure that the Port and the Board type are set correctly in the Arduino IDE. In the Arduino IDE Tools menu, select the following:
Tools → Port → COM31
Tools → Board → Arduino / Genuino Uno
Once the upload is complete, the Arduino and LED should blink on and off
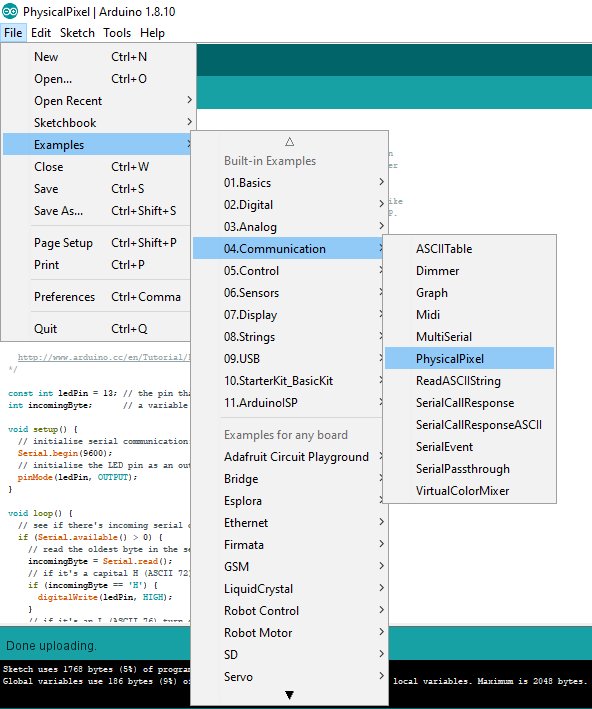
Upload the Arduino example sketch PhysicalPixel.ino onto the Arduino
Open the Arduino sketch PhysicalPixel.ino by going to File → Examples → 04.Communication → PhysicalPixel
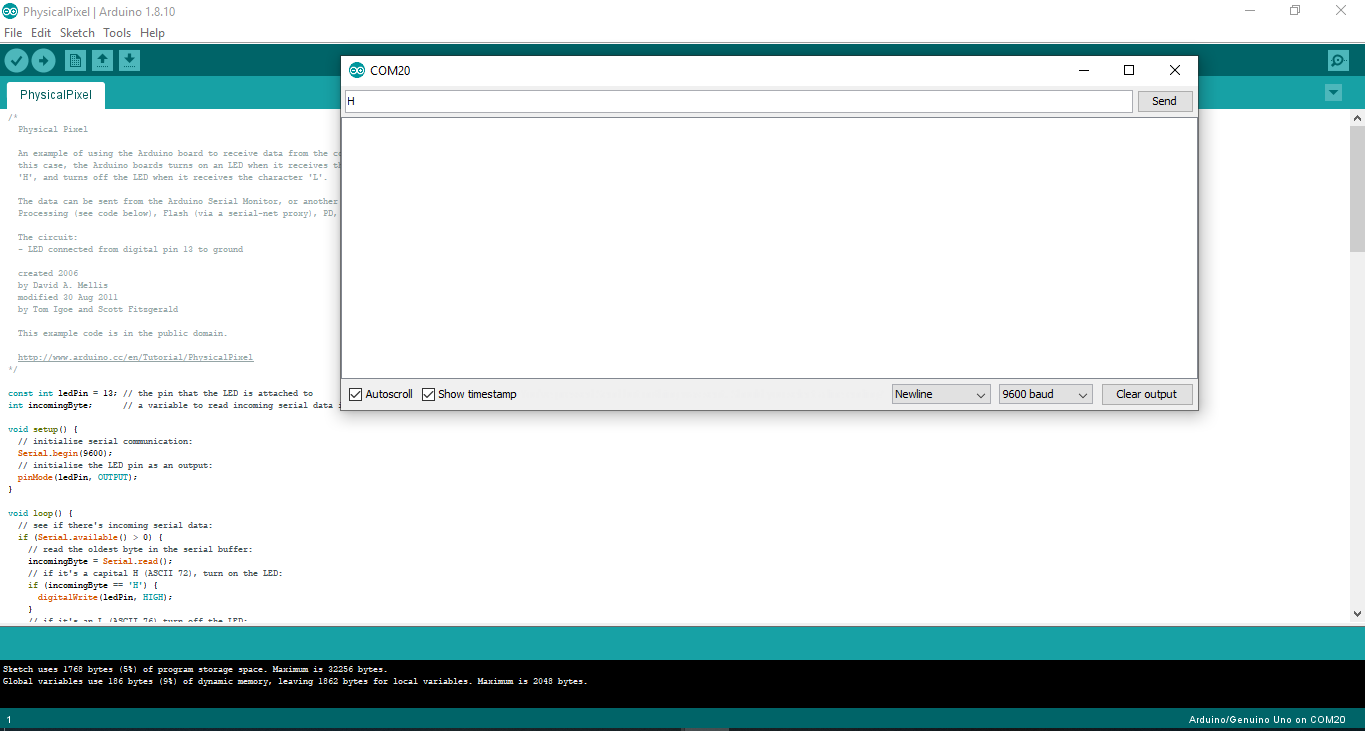
In the Arduino IDE Window that contains the PhysicalPixel.ino sketch, open the Arduino Serial Monitor by going to Tools → Serial Monitor
In the Arduino Serial Monitor type: H and click Send (or press ENTER). Then type: L and click Send (or press ENTER). The letters H and L need to be uppercase. When you click Send or press ENTER, you should see the Arduino LED turn on and off. If have trouble, make sure the Port is set correctly in Tools → Port and make sure the Serial Monitor is set to 9600 baud
To start developing in Python with PyCharm you need to download and install Python fromwww.python.org depending on your platform. and download pycharm platform
Write a Python Script to turn the LED on and off After the LED turns on and off based on sending H and L with the Arduino Serial Monitor and you can turn the LED on and off with the Python REPL, it's time to write a Python script to turn the LED on and off. Again, the serial communication between the Python script and the Arduino is facilitated by the PySerial package. Ensure PySerial is installed before running the Python script.
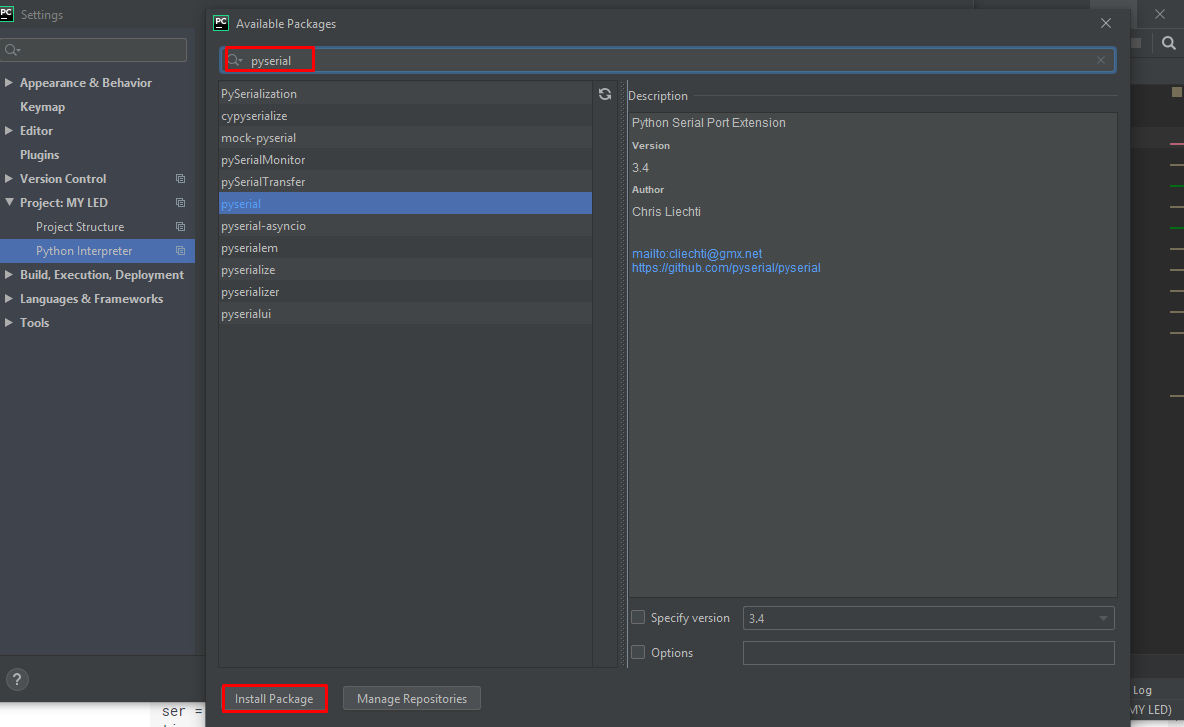
import the PySerial package. Note that even though the package is called PySerial, the line import serial is used.
In the next part of the Python script, connect to the Arduino over the serial port. In the line ser = serial.Serial('COM31', '9600'), ensure the 'COM#' corresponds to the port that worked with the Arduino IDE.
Pyhton has a basic graphical library called Tkinter and is one of the easiest ways to build and design interfaces.
Tkinter is a graphical interface for designing interfaces for programs written in Pyhton, which is the standard and graphical interface for Pyhton which means that it is installed once the Pyhton environment is installed.
-def-: means you know a new function.
- data.write(b'')-:we send over the serial port and in the arduino code we turn the led off using digitalWrite
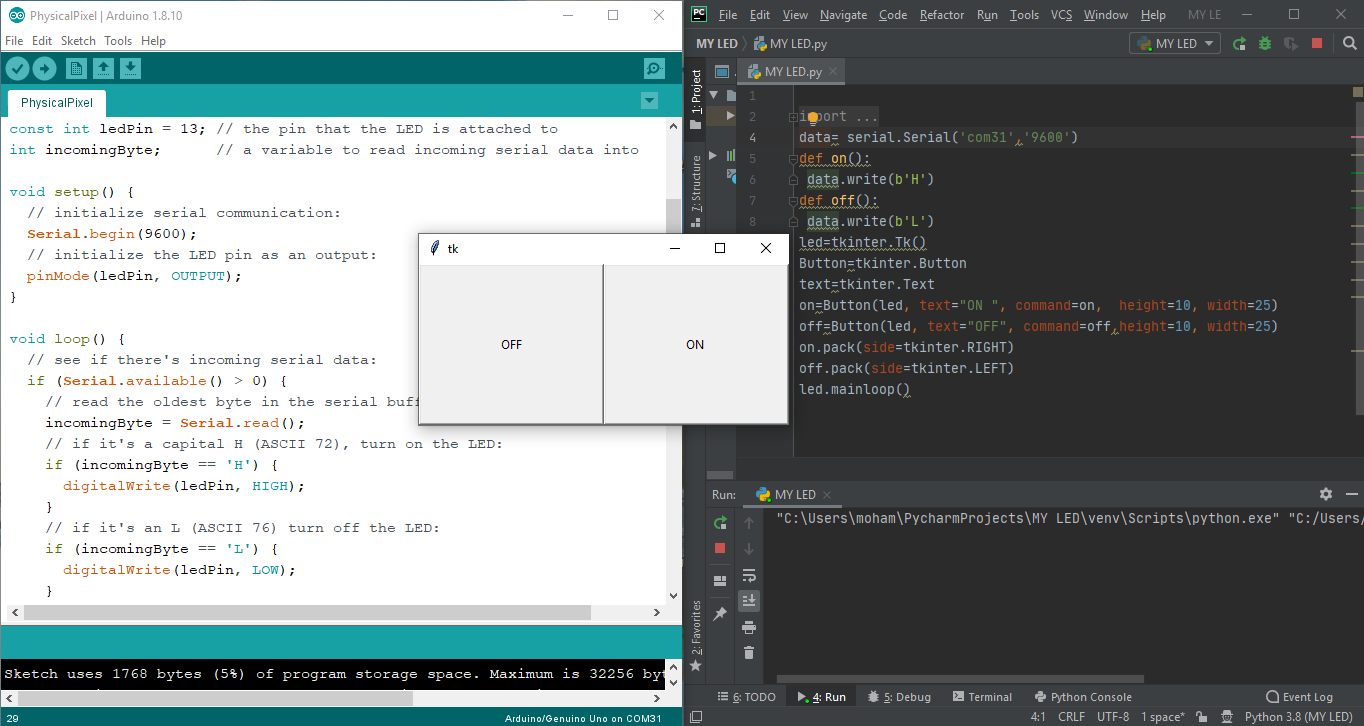
After I finished writing and understanding this Python code, this is the result in the video below
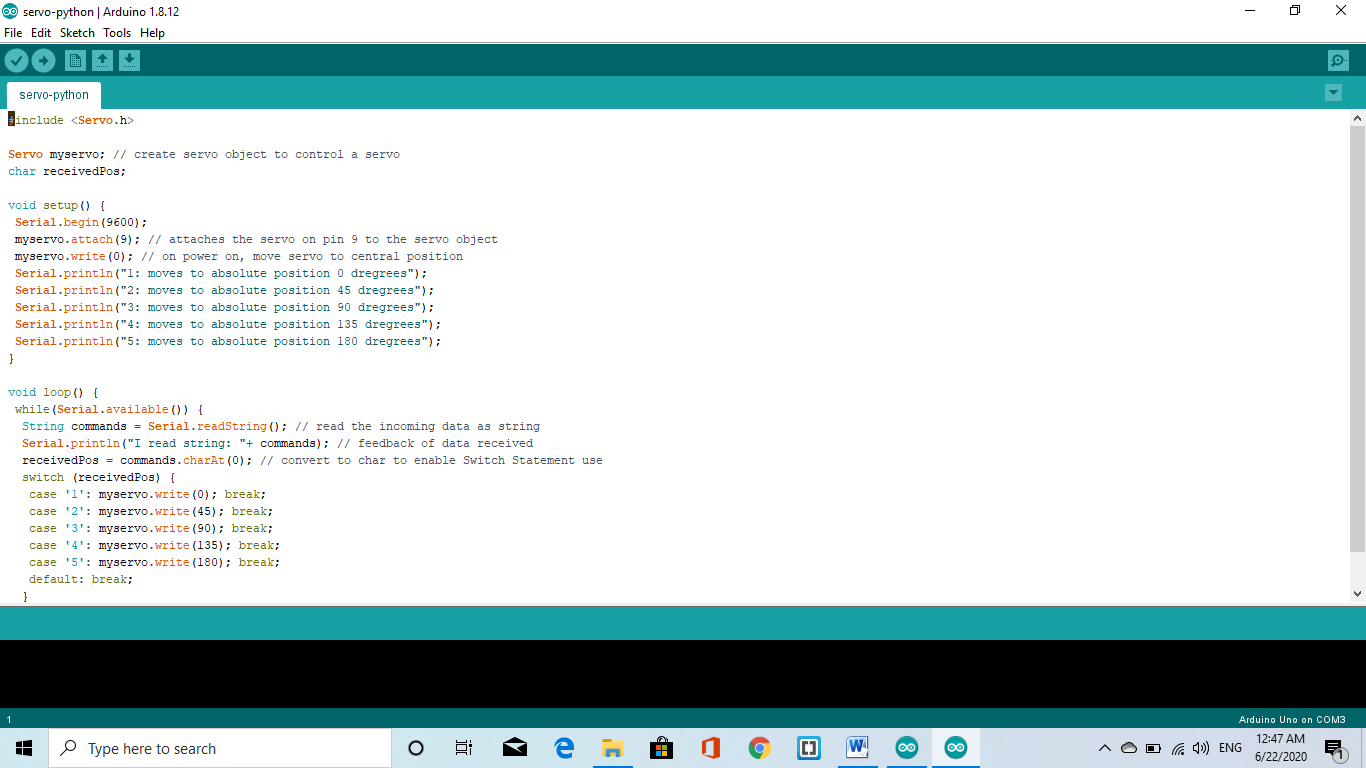
In the week of output Devices, I learned a lot of interesting things about servo motor that will benefit me a lot in my final project, so I did an experiment this week using python programming language
First I wrote the Arduino code for the servo motor
Of course after connecting the servo motor to the Arduino and determining the entrance
Second, I wrote code using Python using libraries after downloading it

After finishing I shot the video to show the result
This is the site for group assignments:Press here
This is the code file: